How to Tell if Your Sagging Drywall in Rancho Santa Fe is a Structural Risk
When you see your ceiling starting to droop, your first thought might be cosmetic damage. But sagging drywall in Rancho Santa Fe homes often signals something far more serious. The combination of older construction methods, coastal humidity, and hidden plumbing leaks creates perfect conditions for structural failure. Acting quickly can prevent a ceiling collapse that puts your family at risk. Fixing hidden kitchen leak damage in North Park homes.
Understanding the difference between harmless settling and dangerous water damage is critical. A small sag might seem minor until the entire section gives way. This guide walks you through the warning signs that indicate when sagging drywall requires immediate professional intervention versus when it might be a simple cosmetic issue. Professional water extraction services for Escondido residents.
Common Causes of Sagging Drywall in Rancho Santa Fe
Water intrusion remains the primary culprit behind most sagging ceiling panels in Rancho Santa Fe. The area’s mix of older homes and newer construction creates different vulnerability patterns. Homes built before the 1980s often used different fastening methods and materials that react differently to moisture exposure. Water Damage Restoration El Cajon.
Coastal humidity plays a significant role in drywall degradation. Rancho Santa Fe sits in a microclimate where morning fog and afternoon marine layer create consistent moisture exposure. This environment causes gradual material breakdown even without active leaks. The hygroscopic nature of gypsum board means it absorbs moisture from the air, leading to weight gain and eventual sagging.. Read more about What Fairbanks Ranch Homeowners Should Know About Pool Leaks Near the Foundation.
Plumbing failures represent another major cause. Copper pipes in older Rancho Santa Fe homes can develop pinhole leaks from electrolysis or mineral buildup. These tiny leaks often go unnoticed for months, slowly saturating ceiling cavities. By the time visible sagging appears, the damage typically extends far beyond what’s immediately visible.
Roof leaks also contribute significantly to ceiling damage. The area’s occasional heavy rains can overwhelm aging roof systems. Water travels along rafters and joists before finding its way through ceiling penetrations. This creates damage patterns that don’t align with the actual leak location, making diagnosis challenging without professional moisture detection equipment. Professional flood restoration services for Del Mar homeowners.
Warning Signs That Indicate Structural Risk
Visible sagging represents just one symptom of potential structural failure. Several other indicators help determine whether you’re facing a cosmetic issue or an imminent safety hazard. Understanding these warning signs helps you make informed decisions about when to call professionals.
Crack patterns around sagging areas often reveal the underlying cause. Hairline cracks that run perpendicular to ceiling joists typically indicate normal settling. However, diagonal cracks that form a spiderweb pattern suggest active movement and potential structural compromise. These patterns develop when weight causes stress concentration at specific points.
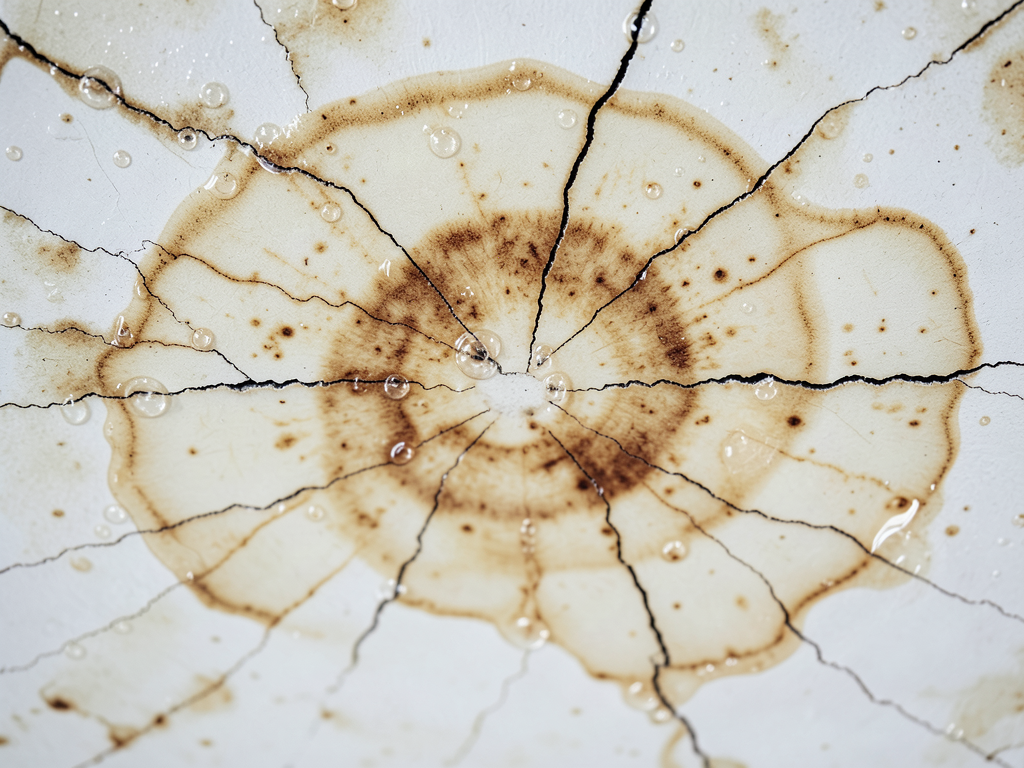
Water staining provides crucial diagnostic information. Brown rings with darker centers indicate active or recent leaks. The darkness level correlates with the severity and duration of water exposure. Light brown staining might suggest a slow leak that’s been active for months, while dark brown with black edges indicates severe, prolonged exposure.
Surface texture changes offer additional clues. Bubbling or blistering of paint and texture often accompanies water damage. This occurs when moisture forces the finish materials away from the substrate. In Rancho Santa Fe’s climate, this can happen even with minimal water exposure due to the high humidity levels.
Sound and feel provide diagnostic information when visual inspection isn’t conclusive. Tapping on suspected damaged areas produces different sounds compared to sound drywall. Water-damaged sections sound hollow or produce a dull thud rather than a crisp tap. The surface may also feel soft or spongy when pressed gently.
Odor serves as another warning indicator. Musty or earthy smells often accompany active moisture problems. These odors result from microbial growth that begins within 24-48 hours of water exposure. In Rancho Santa Fe’s climate, this growth accelerates due to the consistent moisture availability.
Structural vs. Cosmetic Sagging: Key Differences
Understanding the fundamental differences between structural and cosmetic sagging helps determine appropriate response levels. Cosmetic sagging typically results from installation issues or minor settling. Structural sagging indicates active damage that threatens the ceiling’s integrity. Rapid response pipe burst repair in Pacific Beach.
Cosmetic sagging often appears as gentle waves or undulations across ceiling surfaces. This type usually affects large areas uniformly and doesn’t progress rapidly. The underlying structure remains sound, and the drywall panels simply need reattachment or replacement due to original installation problems.. Read more about When You Need to Replace Wet Insulation in Your El Cerrito Attic.
Structural sagging shows distinct characteristics that signal immediate danger. Sharp dips or depressions indicate concentrated weight from water absorption or material degradation. These areas often feel different to the touch and may show additional symptoms like cracking or staining.
Rate of progression provides another diagnostic clue. Cosmetic issues remain relatively stable over time. Structural problems typically worsen, sometimes rapidly. A small sag that doubles in size over a few weeks indicates active damage requiring immediate attention.
Geographic patterns help identify the underlying cause. Uniform sagging across large ceiling areas often results from installation issues or environmental factors. Localized depressions near plumbing fixtures or exterior walls suggest specific failure points requiring targeted repair. EPA mold remediation guidelines.
Age of the home influences the likely cause. Homes in Rancho Santa Fe built before 1980 often used different fastening patterns and materials. These older installations may simply need updating rather than indicating active damage. However, age also increases vulnerability to plumbing failures and roof leaks.
Professional Assessment Process for Sagging Drywall
Professional assessment involves multiple diagnostic steps to determine the true extent of damage. This process goes far beyond visual inspection to identify hidden problems that could lead to future failures.
Moisture detection forms the foundation of professional assessment. Technicians use specialized meters that can detect moisture through various building materials. These devices measure the electrical resistance of materials, which changes significantly when water is present. Readings above 16% moisture content indicate active problems requiring intervention.. Read more about How Shifting Soil and Rain Create Foundation Leaks in Kensington.
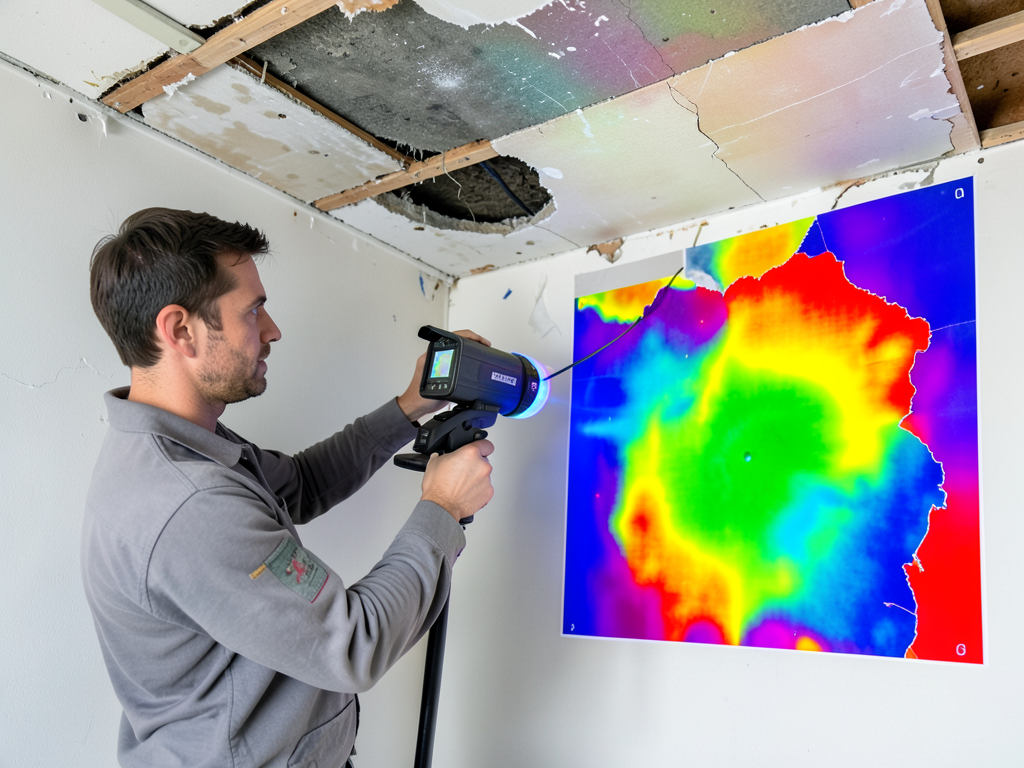
Thermal imaging provides another crucial diagnostic tool. Infrared cameras detect temperature differences that indicate moisture presence. Wet materials appear cooler than dry materials because evaporation creates a cooling effect. This technology can identify problem areas behind finished surfaces without destructive testing.
Structural evaluation examines the supporting framework. Technicians check for rot, termite damage, or other deterioration that compromises load-bearing capacity. This step often requires access to attic spaces or removal of small ceiling sections to inspect the underlying structure.
Mold assessment becomes critical when moisture has been present for extended periods. Professionals test for airborne spores and surface growth. The presence of certain mold species indicates long-term moisture exposure and potential health hazards requiring specialized remediation.
Plumbing inspection identifies potential water sources. This may involve pressure testing supply lines or using acoustic listening devices to detect active leaks. In Rancho Santa Fe’s older homes, this step often reveals problems that homeowners weren’t aware existed.
Roof inspection determines whether exterior water intrusion contributes to the problem. This includes checking flashing, vent boots, and general roof condition. Even small roof defects can cause significant interior damage over time.
San Diego Building Code Requirements for Ceiling Repairs
California Building Code Section 2508 governs drywall installation and repair requirements. These regulations ensure that repairs meet minimum safety standards and maintain structural integrity. Understanding these requirements helps homeowners verify that contractors follow proper procedures.
Fastener spacing requirements vary based on ceiling height and drywall thickness. For standard 1/2-inch drywall on ceilings up to 10 feet high, fasteners must be installed every 12 inches along joists. This spacing increases to 16 inches for 5/8-inch fire-rated drywall. Proper fastening prevents future sagging and ensures adequate load distribution.
Moisture-resistant drywall requirements apply to areas with high humidity or direct water exposure. While standard drywall suffices for most interior applications, areas near bathrooms, kitchens, or exterior walls may require green board or cement board alternatives. These materials resist moisture absorption that leads to sagging.
Fire separation requirements affect repair methods in certain building configurations. Multi-family dwellings and homes with attached garages require specific fire-rated assemblies. Repairs must maintain these fire ratings using approved materials and methods. This often involves installing fire-resistant joint compound and tape systems.
Permit requirements vary based on repair scope. Simple drywall replacement in single-family homes typically doesn’t require permits. However, repairs involving structural modifications, electrical work, or plumbing changes may require permits from the San Diego County Building Department. Always verify permit requirements before beginning extensive repairs.
Energy efficiency requirements affect repair methods in certain applications. Title 24 mandates specific insulation levels and air sealing requirements. Repairs that involve removing ceiling materials must often address these energy requirements, potentially increasing project scope and cost.
Mold Remediation Protocols for Water-Damaged Ceilings
Mold growth represents a serious health hazard that often accompanies water-damaged drywall. California Health and Safety Code Section 26156 establishes specific requirements for mold remediation to protect occupant health and prevent cross-contamination.
Containment procedures prevent mold spore spread during remediation. This involves sealing work areas with plastic sheeting and using negative air pressure to prevent spore escape. All HVAC vents in affected areas must be sealed to prevent system contamination. These procedures protect unaffected areas from cross-contamination.
Personal protective equipment requirements ensure worker safety during remediation. Technicians must wear N-95 respirators or better, gloves, and protective clothing. Eye protection becomes mandatory when removing damaged materials that may release spores or debris. These precautions prevent exposure to potentially harmful substances.
Removal procedures follow specific protocols based on contamination extent. Small areas under 10 square feet may be cleaned using HEPA vacuuming and antimicrobial treatments. Larger areas require complete material removal and disposal. All removed materials must be sealed in plastic bags before leaving the work area.
Verification procedures confirm successful remediation. This involves visual inspection, moisture testing, and air quality sampling. Clearance testing by independent third parties provides documentation that remediation meets industry standards. These steps ensure the space is safe for reoccupation.
Post-remediation procedures prevent future mold growth. This includes addressing the underlying moisture source, improving ventilation, and using mold-resistant materials in repairs. These preventive measures reduce the likelihood of recurrence and protect the investment in remediation work.
DIY Assessment: When to Call Professionals
Many homeowners wonder whether they can handle sagging drywall assessment themselves. While some basic evaluation steps are safe for DIY, certain situations require immediate professional intervention to prevent injury or further damage.
Safe DIY assessment steps include visual inspection for obvious signs of water damage, checking for soft spots by pressing gently on the surface, and looking for water stains or discoloration. These steps help determine whether the problem appears minor or requires professional attention.
Warning signs that indicate immediate professional need include large sagging areas, active water dripping, visible mold growth, or areas that feel unstable when touched. These conditions suggest structural compromise that could lead to sudden collapse, potentially causing injury.
Size considerations affect assessment safety. Small areas under 2 feet square might be safe for careful DIY evaluation. Larger areas or those near weight-bearing walls should be assessed by professionals who can evaluate structural implications properly.
Age considerations matter significantly. Homes built before 1980 may contain asbestos in texture coatings or joint compounds. Disturbing these materials without proper testing and procedures creates serious health hazards. Professional assessment includes asbestos testing when appropriate.
Plumbing proximity increases risk assessment complexity. Ceilings near bathrooms, kitchens, or laundry areas often conceal active plumbing leaks. These situations require moisture detection equipment and plumbing expertise that most homeowners don’t possess.
Time considerations affect decision-making. If the sagging appeared suddenly or is worsening rapidly, professional assessment becomes urgent. Gradual changes over months might allow more time for DIY evaluation, but shouldn’t delay professional consultation indefinitely.
Cost Factors for Professional Drywall Repair in Rancho Santa Fe
Professional repair costs vary significantly based on damage extent, repair complexity, and local market conditions. Understanding these factors helps homeowners budget appropriately and avoid unexpected expenses.
Damage extent represents the primary cost driver. Small repairs involving single panels might cost $300-500. Extensive repairs requiring multiple panels, structural reinforcement, and finish work can exceed $3,000. The difference often lies in whether the problem is isolated or systemic.
Access difficulty affects labor costs substantially. Ceilings requiring scaffolding or extensive furniture moving increase project complexity. Vaulted ceilings or those with intricate lighting fixtures require additional time and specialized equipment, driving up costs.
Material requirements vary based on repair scope and local building codes. Standard drywall costs $10-15 per sheet, but specialized materials like moisture-resistant or fire-rated boards cost more. Finish materials including joint compound, tape, and texture materials add $50-100 to typical repairs.
Permit requirements can add $100-500 to project costs depending on scope and local jurisdiction. While many minor repairs don’t require permits, extensive work or repairs involving structural modifications typically do. Factor permit costs into project budgeting.
Insurance considerations affect out-of-pocket costs. Many homeowners policies cover sudden water damage but exclude gradual deterioration or maintenance issues. Understanding coverage limits and deductibles helps determine whether to file claims or handle repairs privately.
Emergency service premiums apply when immediate response is required. After-hours calls, weekend service, or rapid response situations typically cost 25-50% more than standard appointments. While sometimes necessary for safety reasons, these premiums can significantly impact total project costs.
Prevention Strategies for Long-Term Ceiling Health
Preventing sagging drywall requires proactive maintenance and awareness of risk factors. Implementing preventive measures can extend ceiling life and avoid costly repairs.
Regular roof inspections identify potential water intrusion points before they cause damage. Annual inspections should check flashing, vent boots, and general roof condition. Prompt repair of minor defects prevents water from reaching interior spaces where it causes drywall damage.
Plumbing maintenance prevents many ceiling failures. Annual inspection of visible supply lines and drain pipes can identify corrosion or wear before leaks develop. Water pressure monitoring helps detect supply line problems early. Consider replacing old copper pipes with PEX in homes over 20 years old.
Humidity control protects against moisture-related sagging. Use exhaust fans in bathrooms and kitchens to remove moisture at the source. Consider whole-house dehumidifiers in Rancho Santa Fe’s humid climate. Proper attic ventilation prevents moisture accumulation that can affect ceiling materials.
Proper insulation installation prevents condensation-related moisture problems. Ensure attic insulation doesn’t block soffit vents, which can create moisture traps. Proper vapor barriers in appropriate climates prevent moisture migration through building assemblies.
Regular visual inspections help catch problems early. Check ceilings monthly for new stains, cracks, or changes in surface texture. Early detection often means simpler, less expensive repairs. Pay special attention to areas near plumbing fixtures and exterior walls.
Professional maintenance agreements provide systematic prevention. Many restoration companies offer annual inspections that include moisture detection and structural evaluation. These services cost $200-400 annually but can prevent thousands in repair costs by catching problems early.
Insurance Claim Process for Water-Damaged Ceilings
Navigating insurance claims for water-damaged ceilings requires understanding policy specifics and proper documentation. Following correct procedures increases claim approval likelihood and ensures proper compensation.
Immediate notification requirements vary by policy. Most policies require prompt reporting of damage, typically within 14-30 days of discovery. Delayed reporting can provide grounds for claim denial based on alleged negligence or failure to mitigate damage.
Documentation requirements include photos, videos, and written descriptions of damage. Document the damage extent before any cleanup or repair attempts. Keep all receipts for emergency services like water extraction or temporary repairs. This documentation supports your claim and helps establish damage extent.
Professional estimates strengthen claims significantly. Insurance companies often question DIY assessments or estimates. Professional restoration companies provide detailed damage assessments and repair estimates that carry more weight with adjusters. Many companies work directly with insurance companies to streamline the process.
Mitigation requirements protect against claim reduction. Policies typically require policyholders to take reasonable steps to prevent further damage. This might include water extraction, temporary roof patching, or plumbing shutoff. Failure to mitigate can reduce claim payments by the amount of additional damage that could have been prevented.
Depreciation considerations affect claim payments. Many policies pay actual cash value initially, then provide additional depreciation recovery upon completion of repairs. Understanding this process helps manage expectations about initial claim payments versus final settlement amounts.
Contractor selection impacts claim outcomes. Insurance companies may recommend specific contractors, but you have the right to choose your own. Using licensed, insured contractors with experience in insurance restoration ensures proper repairs and documentation that satisfies insurance requirements.
Emergency Response Steps for Active Ceiling Failures
When ceiling failure is actively occurring, immediate action can prevent injury and minimize damage. Following these steps helps manage the emergency safely while preparing for professional repair.
Safety evacuation represents the first priority. Clear the area beneath sagging sections immediately. Water-soaked drywall can weigh 50-100 pounds per panel and cause serious injury if it falls. Keep children and pets away from affected areas until professionals declare them safe.
Water source control prevents additional damage. If the failure involves active water intrusion, locate and shut off the water source if safely accessible. This might mean turning off the main water valve or isolating specific fixtures. Don’t attempt plumbing repairs yourself during active failure.
Damage containment limits spread to unaffected areas. Place buckets or plastic sheeting under active leaks to catch dripping water. Move furniture and valuables away from affected areas. These steps protect belongings and make professional cleanup more efficient.
Documentation for insurance starts during the emergency. Take photos and videos showing the damage extent and any active water intrusion. This documentation becomes crucial for insurance claims and helps professionals understand the failure sequence.
Professional notification should happen immediately. Many restoration companies offer 24/7 emergency response. Quick professional intervention can prevent further damage and begin the restoration process sooner. Have your insurance information ready when calling for emergency service.
Temporary support measures require caution. While it might seem helpful to prop up sagging areas with boards or jacks, this can create additional hazards if not done properly. Leave structural support to professionals who understand load distribution and failure mechanics.
Professional vs. DIY Repair: Making the Right Choice
Deciding between professional and DIY repair involves weighing several factors including safety, cost, skill level, and long-term reliability. Understanding these considerations helps make informed decisions that protect your investment and family.
Safety considerations often favor professional repair. Working overhead with heavy materials creates fall and injury risks. Electrical hazards exist when working near light fixtures or wiring. Professional technicians have proper safety equipment and training to work safely in these conditions.
Skill requirements for quality repairs extend beyond basic carpentry. Proper drywall installation requires understanding joint compound application, texture matching, and finishing techniques. Poor DIY repairs often create visible defects that reduce home value and may require professional correction later.
Time investment for DIY repairs often exceeds expectations. What might seem like a weekend project can stretch into weeks for inexperienced workers. Professional teams can complete most ceiling repairs in 1-2 days, minimizing disruption to your household.
Code compliance becomes critical for resale and insurance purposes. Professional repairs meet current building codes and include proper documentation. DIY repairs may not meet code requirements, potentially creating issues when selling your home or filing future insurance claims.
Hidden damage detection requires professional expertise. What appears to be simple drywall replacement might involve structural repairs, mold remediation, or plumbing fixes. Professionals can identify and address these hidden issues, preventing future failures.
Cost comparison should include all factors. While DIY might save labor costs initially, factor in tool purchases, material waste from mistakes, and potential costs of correcting poor repairs. Professional repairs often include warranties that provide long-term value protection.
Frequently Asked Questions
How can I tell if my sagging drywall is an emergency?
Active water dripping, large sagging areas, visible mold, or sections that feel unstable indicate emergencies requiring immediate professional attention. These conditions suggest structural compromise that could lead to sudden collapse and injury.
Will my homeowners insurance cover sagging drywall repair?
Coverage depends on the cause. Sudden events like burst pipes or roof leaks are typically covered. Gradual deterioration from maintenance issues or normal aging usually isn’t covered. Check your specific policy or consult your insurance agent for details.
How long does professional drywall repair take?
Most repairs take 1-3 days depending on damage extent. Simple panel replacement might finish in one day. Complex repairs involving structural work, mold remediation, or extensive finish work take longer. Your contractor can provide specific timelines after assessment.
Can I just patch the sagging area instead of replacing the whole ceiling?
Patching might work for small, isolated damage. However, widespread sagging often indicates systemic issues requiring broader repair. Patching without addressing underlying causes typically leads to recurring problems and may not meet building code requirements.
What causes drywall to sag in the first place?
Primary causes include water damage from leaks, excessive weight from moisture absorption, improper installation, or structural movement. Rancho Santa Fe’s coastal humidity accelerates moisture-related sagging even without active leaks.
How much does professional sagging drywall repair cost?
Costs range from $300-500 for simple repairs to $3,000+ for extensive damage involving structural work or mold remediation. Factors affecting cost include damage extent, access difficulty, material requirements, and permit needs.
Should I be concerned about asbestos in my older home’s ceiling?
Homes built before 1980 may contain asbestos in texture coatings or joint compounds. Disturbing these materials creates serious health hazards. Professional assessment includes asbestos testing when appropriate, and proper procedures if asbestos is present.
How can I prevent my drywall from sagging in the future?
Preventive measures include regular roof inspections, plumbing maintenance, humidity control, proper insulation, and annual professional inspections. Addressing small issues promptly prevents them from becoming major problems requiring expensive repairs.
- Check for Water Stains
Look for brown rings or discoloration that indicates active or past water intrusion. Dark stains suggest severe, prolonged exposure requiring immediate attention.
- Test Surface Stability
Gently press on sagging areas. Soft or spongy spots indicate moisture damage. Areas that feel solid likely have cosmetic rather than structural issues.
- Examine Crack Patterns
Diagonal cracks forming spiderweb patterns suggest active movement and structural compromise. Perpendicular hairline cracks often indicate normal settling.
- Check for Mold Growth
Visible mold or musty odors indicate moisture problems that require professional remediation. Mold can develop within 24-48 hours of water exposure.
- Assess Size and Location
Large sagging areas or those near plumbing fixtures and exterior walls warrant professional assessment. Small, isolated sags might be cosmetic.
- Evacuate the Area
Clear all people and pets from beneath sagging sections immediately. Water-soaked drywall can weigh 50-100 pounds and cause serious injury if it falls.
- Control Water Source
If safe to do so, shut off water supply to stop active leaks. This prevents additional damage while waiting for professional help.
- Contain the Damage
Place buckets under active leaks and move furniture away from affected areas. This limits damage spread and protects belongings.
- Document Everything
Take photos and videos of the damage and any active water intrusion. This documentation is crucial for insurance claims.
- Call Professionals Immediately
Contact restoration companies that offer 24/7 emergency service. Quick professional intervention prevents further damage and begins restoration sooner.
Sagging drywall in Rancho Santa Fe homes requires careful evaluation to determine whether you’re facing a simple cosmetic issue or a serious structural risk. The combination of coastal humidity, aging infrastructure, and varied construction methods in the area creates unique challenges that demand professional assessment.
Understanding the warning signs helps you make informed decisions about when to handle issues yourself versus when to call professionals. Remember that water damage often extends far beyond visible symptoms, and what looks like a small problem can indicate extensive hidden damage.
Professional assessment using moisture detection, thermal imaging, and structural evaluation provides the comprehensive diagnosis needed to ensure safe, effective repairs. These services not only fix current problems but also identify underlying causes to prevent future failures.
Don’t wait until a small sag becomes a ceiling collapse. If you’re seeing warning signs of structural damage, call (858) 203-2555 today to schedule your professional inspection. Our certified technicians serve Rancho Santa Fe and all surrounding San Diego communities with 24/7 emergency response when you need it most.
Protect your home and family by addressing sagging drywall concerns promptly. Professional evaluation provides peace of mind and ensures your ceiling repairs meet all safety and building code requirements. Call (858) 203-2555 now to take the first step toward a safe, stable ceiling. For more information, visit International Residential Code plumbing requirements.
You may also find this helpful. Why Your Paradise Hills AC Unit is Leaking Through the Ceiling.
{
“@context”: “https://schema.org”,
“@type”: “BlogPosting”,
“headline”: “How to Tell if Your Sagging Drywall in Rancho Santa Fe is a Structural Risk”,
“description”: “Discover the warning signs of sagging drywall in Rancho Santa Fe homes. Learn when it’s just cosmetic vs. a serious structural risk requiring immediate professional repair.”,
“wordCount”: 4058,
“datePublished”: “2026-03-28T11:00:00.000Z”,
“dateModified”: “2026-03-28T11:00:00.000Z”,
“inLanguage”: “en-US”,
“mainEntityOfPage”: {
“@type”: “WebPage”,
“@id”: “https://keystonewaterdamagerestorationsandiego.com”
},
“publisher”: {
“@type”: “LocalBusiness”,
“name”: “Keystone Water Damage Restoration San Diego”,
“url”: “https://keystonewaterdamagerestorationsandiego.com”
},
“author”: {
“@type”: “Organization”,
“name”: “Keystone Water Damage Restoration San Diego”,
“url”: “https://keystonewaterdamagerestorationsandiego.com”
},
“image”: {
“@type”: “ImageObject”,
“url”: “https://keystonewaterdamagerestorationsandiego.com/wp-content/uploads/2026/03/how-to-tell-if-your-sagging-drywall-in-rancho-sant-1.png”
}
}
{
“@context”: “https://schema.org”,
“@type”: “LocalBusiness”,
“name”: “Keystone Water Damage Restoration San Diego”,
“url”: “https://keystonewaterdamagerestorationsandiego.com”,
“address”: {
“@type”: “PostalAddress”,
“addressLocality”: “San Diego”
},
“areaServed”: {
“@type”: “City”,
“name”: “San Diego”
}
}
{
“@context”: “https://schema.org”,
“@type”: “FAQPage”,
“mainEntity”: [
{
“@type”: “Question”,
“name”: “How can I tell if my sagging drywall is an emergency?”,
“acceptedAnswer”: {
“@type”: “Answer”,
“text”: “Active water dripping, large sagging areas, visible mold, or sections that feel unstable indicate emergencies requiring immediate professional attention. These conditions suggest structural compromise that could lead to sudden collapse and injury.”
}
},
{
“@type”: “Question”,
“name”: “Will my homeowners insurance cover sagging drywall repair?”,
“acceptedAnswer”: {
“@type”: “Answer”,
“text”: “Coverage depends on the cause. Sudden events like burst pipes or roof leaks are typically covered. Gradual deterioration from maintenance issues or normal aging usually isn’t covered. Check your specific policy or consult your insurance agent for details.”
}
},
{
“@type”: “Question”,
“name”: “How long does professional drywall repair take?”,
“acceptedAnswer”: {
“@type”: “Answer”,
“text”: “Most repairs take 1-3 days depending on damage extent. Simple panel replacement might finish in one day. Complex repairs involving structural work, mold remediation, or extensive finish work take longer. Your contractor can provide specific timelines after assessment.”
}
},
{
“@type”: “Question”,
“name”: “What causes drywall to sag in the first place?”,
“acceptedAnswer”: {
“@type”: “Answer”,
“text”: “Primary causes include water damage from leaks, excessive weight from moisture absorption, improper installation, or structural movement. Rancho Santa Fe’s coastal humidity accelerates moisture-related sagging even without active leaks.”
}
},
{
“@type”: “Question”,
“name”: “How much does professional sagging drywall repair cost?”,
“acceptedAnswer”: {
“@type”: “Answer”,
“text”: “Costs range from $300-500 for simple repairs to $3,000+ for extensive damage involving structural work or mold remediation. Factors affecting cost include damage extent, access difficulty, material requirements, and permit needs.”
}
},
{
“@type”: “Question”,
“name”: “Should I be concerned about asbestos in my older home’s ceiling?”,
“acceptedAnswer”: {
“@type”: “Answer”,
“text”: “Homes built before 1980 may contain asbestos in texture coatings or joint compounds. Disturbing these materials creates serious health hazards. Professional assessment includes asbestos testing when appropriate, and proper procedures if asbestos is present.”
}
},
{
“@type”: “Question”,
“name”: “How can I prevent my drywall from sagging in the future?”,
“acceptedAnswer”: {
“@type”: “Answer”,
“text”: “Preventive measures include regular roof inspections, plumbing maintenance, humidity control, proper insulation, and annual professional inspections. Addressing small issues promptly prevents them from becoming major problems requiring expensive repairs.”
}
}
]
}
{
“@context”: “https://schema.org”,
“@type”: “HowTo”,
“name”: “How to Identify Structural Drywall Damage”,
“step”: [
{
“@type”: “HowToStep”,
“position”: 1,
“name”: “Check for Water Stains”,
“text”: “Look for brown rings or discoloration that indicates active or past water intrusion. Dark stains suggest severe, prolonged exposure requiring immediate attention.”
},
{
“@type”: “HowToStep”,
“position”: 2,
“name”: “Test Surface Stability”,
“text”: “Gently press on sagging areas. Soft or spongy spots indicate moisture damage. Areas that feel solid likely have cosmetic rather than structural issues.”
},
{
“@type”: “HowToStep”,
“position”: 3,
“name”: “Examine Crack Patterns”,
“text”: “Diagonal cracks forming spiderweb patterns suggest active movement and structural compromise. Perpendicular hairline cracks often indicate normal settling.”
},
{
“@type”: “HowToStep”,
“position”: 4,
“name”: “Check for Mold Growth”,
“text”: “Visible mold or musty odors indicate moisture problems that require professional remediation. Mold can develop within 24-48 hours of water exposure.”
},
{
“@type”: “HowToStep”,
“position”: 5,
“name”: “Assess Size and Location”,
“text”: “Large sagging areas or those near plumbing fixtures and exterior walls warrant professional assessment. Small, isolated sags might be cosmetic.”
}
],
“image”: “https://keystonewaterdamagerestorationsandiego.com/wp-content/uploads/2026/03/how-to-tell-if-your-sagging-drywall-in-rancho-sant-1.png”
}
{
“@context”: “https://schema.org”,
“@type”: “BreadcrumbList”,
“itemListElement”: [
{
“@type”: “ListItem”,
“position”: 1,
“name”: “Home”,
“item”: “https://keystonewaterdamagerestorationsandiego.com”
},
{
“@type”: “ListItem”,
“position”: 2,
“name”: “Blog”,
“item”: “https://keystonewaterdamagerestorationsandiego.com/blog”
},
{
“@type”: “ListItem”,
“position”: 3,
“name”: “How to Tell if Your Sagging Drywall in Rancho Santa Fe is a Structural Risk”
}
]
}
{
“@context”: “https://schema.org”,
“@type”: “Service”,
“serviceType”: “Water Damage Restoration”,
“provider”: {
“@type”: “LocalBusiness”,
“name”: “Keystone Water Damage Restoration San Diego”,
“url”: “https://keystonewaterdamagerestorationsandiego.com”
},
“areaServed”: {
“@type”: “City”,
“name”: “San Diego”
},
“description”: “Discover the warning signs of sagging drywall in Rancho Santa Fe homes. Learn when it’s just cosmetic vs. a serious structural risk requiring immediate professional repair.”
}